Problem
There is a common use case where users require temporary resources to test something, often referred to as a Proof of Concept (POC). Unfortunately, many POCs are forgotten and left to consume unnecessary resources, energy, and money. What if we could create self-destructing resources that automatically expire after a specified time? This would be a convenient and efficient solution.
The aim is to offer the end user a custom form that deploys specific resources, such as a virtual machine (VM). The user can indicate whether the VM is to be permanent or used for a POC. If it is for POC, the user must specify how long the VM is needed, but not beyond a certain limit (X). Once that date is reached, the VM will either be destroyed or powered off for X days before being destroyed. Additionally, the decommission date will be delayed by 30 days by default.
This article shows how to implement the POC feature only. It assumes that the commission and decommission workflows already exist, and the POC feature is integrated into the existing workflow.
We will see how to do that only in Aria Orchestrator now and in Aria Automation in the upcoming parts.
Aria Orchestrator
Prerequisite
- Commission workflow, which deploys the resource (VM for example)
- Decommission workflow, which destroys the resource (VM for example)
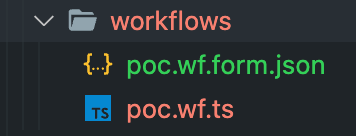
New Workflow
- poc.wf.ts — workflow itself
- poc.wf.form.ts — workflow custom form
The poc.wf.ts has two main elements:
- Workflow TypeDecorator — The place where all the inputs/attributes should be provided.
- Main Class — The main code will be written. It will be converted to the Scriptable Task at the end.
Workflow TypeDecorator
In the workflow, we need to specify all the details about our workflow skeleton, like name, path where it will be created in vRO, description, and the main — inputs. Inputs have a property like _type, description, _defaultValue_, and many others (precisely the same as in vRO GUI). Those are all support properties:
interface VroWorkflow {
 id?: string;
 name?: string;
 path?: string;
 description?: string;
 version?: string;
 input?: VroParameterList;
 output?: VroParameterList;
 attributes?: VroAttributeList;
 presentation?: string;
}
The question mark means those properties are optional.
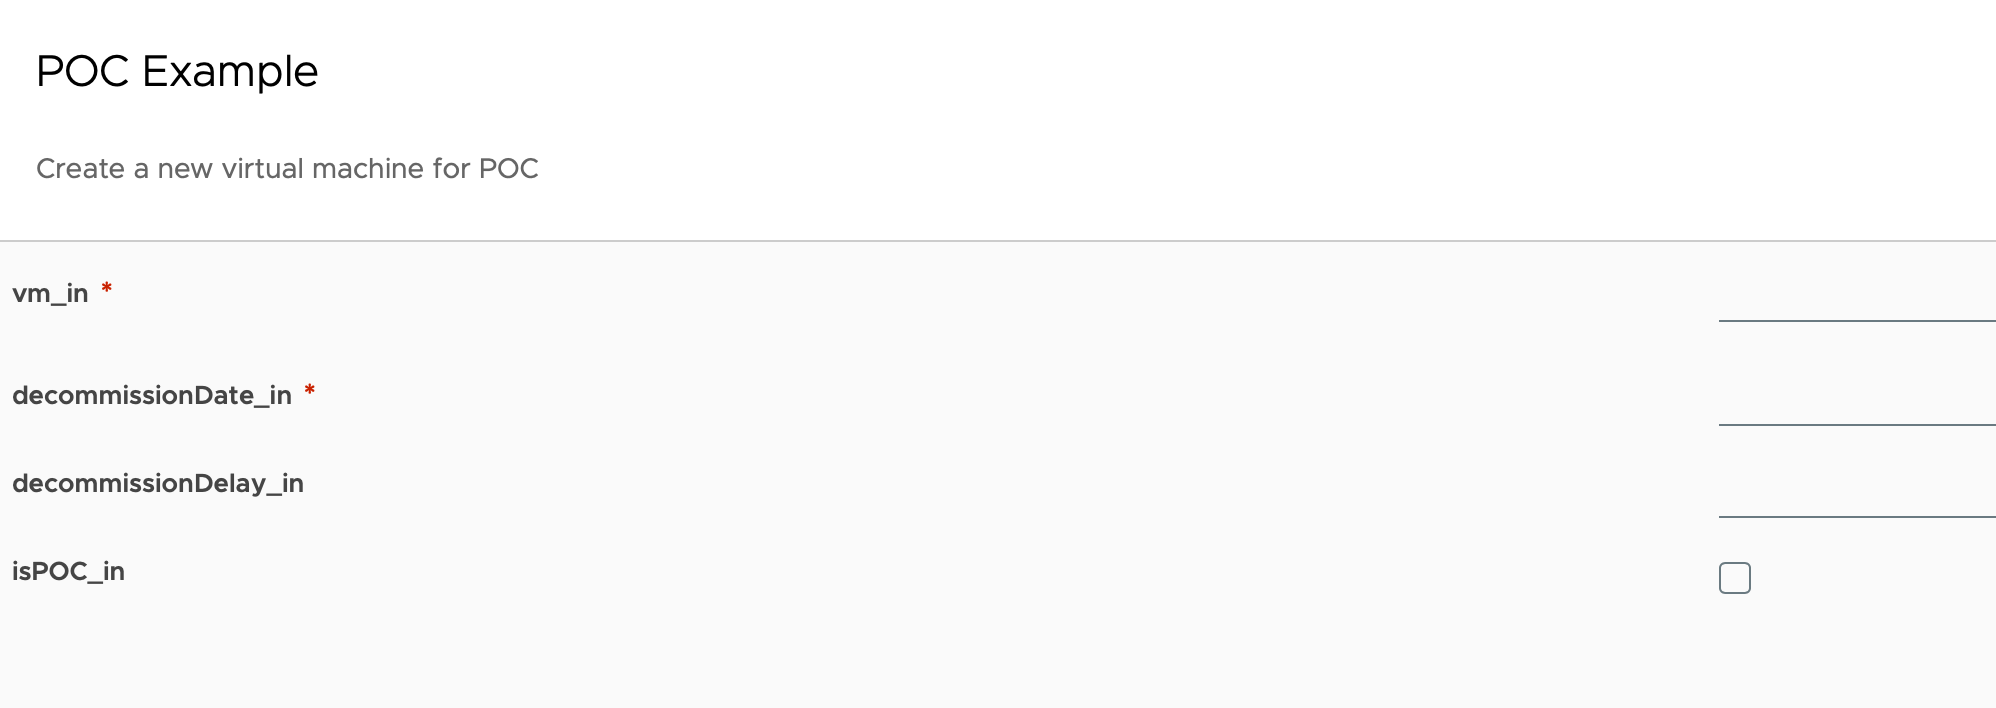
Now, our inputs should look like that:
import { Workflow, Out } from "vrotsc-annotations";
import { Functions } from "../actions/functions";

@Workflow({
  name: "POC Example",
  path: "MyOrg/MyProject",
  id: "",
  description: "Create a new virtual machine for POC",
  attributes: {},
  input: {
    vm_in: {
      type: "VC:VirtualMachine",
      description: "VM Name",
      required: true
    },
    decommissionDate_in: {
      type: "Date",
      description: "Automatic Decommissioning Target Date",
      required: true
    },
    decommissionDelay_in: {
      type: "number",
      description: "Days until decommissioning",
      required: false
    },
    isPOC_in: {
      type: "boolean",
      description: "Is this resource deployed for a Proof of Concept (POC)?",
      required: false,
      defaultValue: "false"
    }
  },
  output: {
    result: { type: "Any" }
  },
  presentation: ""
})
The type value should match the exact type in vRO. It is case-sensitive.
For example, the type of _virtulamachine_ in Aria Building tools is _VcVirtualMachine, which is used in a normal body code. But for Input or Variables, it should be VC:VirtualMachine
Main Class
The method Install contains a conditional statement that checks whether the isPOC in parameter is true. If so, the method calls a Functions class method to execute a decommission workflow.
export class Main {
  public install(decommissionDate_in: Date, isPOC_in: boolean, decommissionDelay_in: number, vm_in: VcVirtualMachine, @Out result: any): void {
    const func = new Functions();
    const decommissionWf = "f87bedce-cf1f-3964-8a7d-xxxxxxxx"; // 'Decommissions VM' workflow ID

    if (isPOC_in) {
      System.log(`The POC VM named '${vm_in.name}' has been scheduled for decommissioning on ${decommissionDate_in}.`);
      func.executeDecommissionWorkflow(vm_in, decommissionWf, decommissionDate_in, decommissionDelay_in);
    }
  }
}
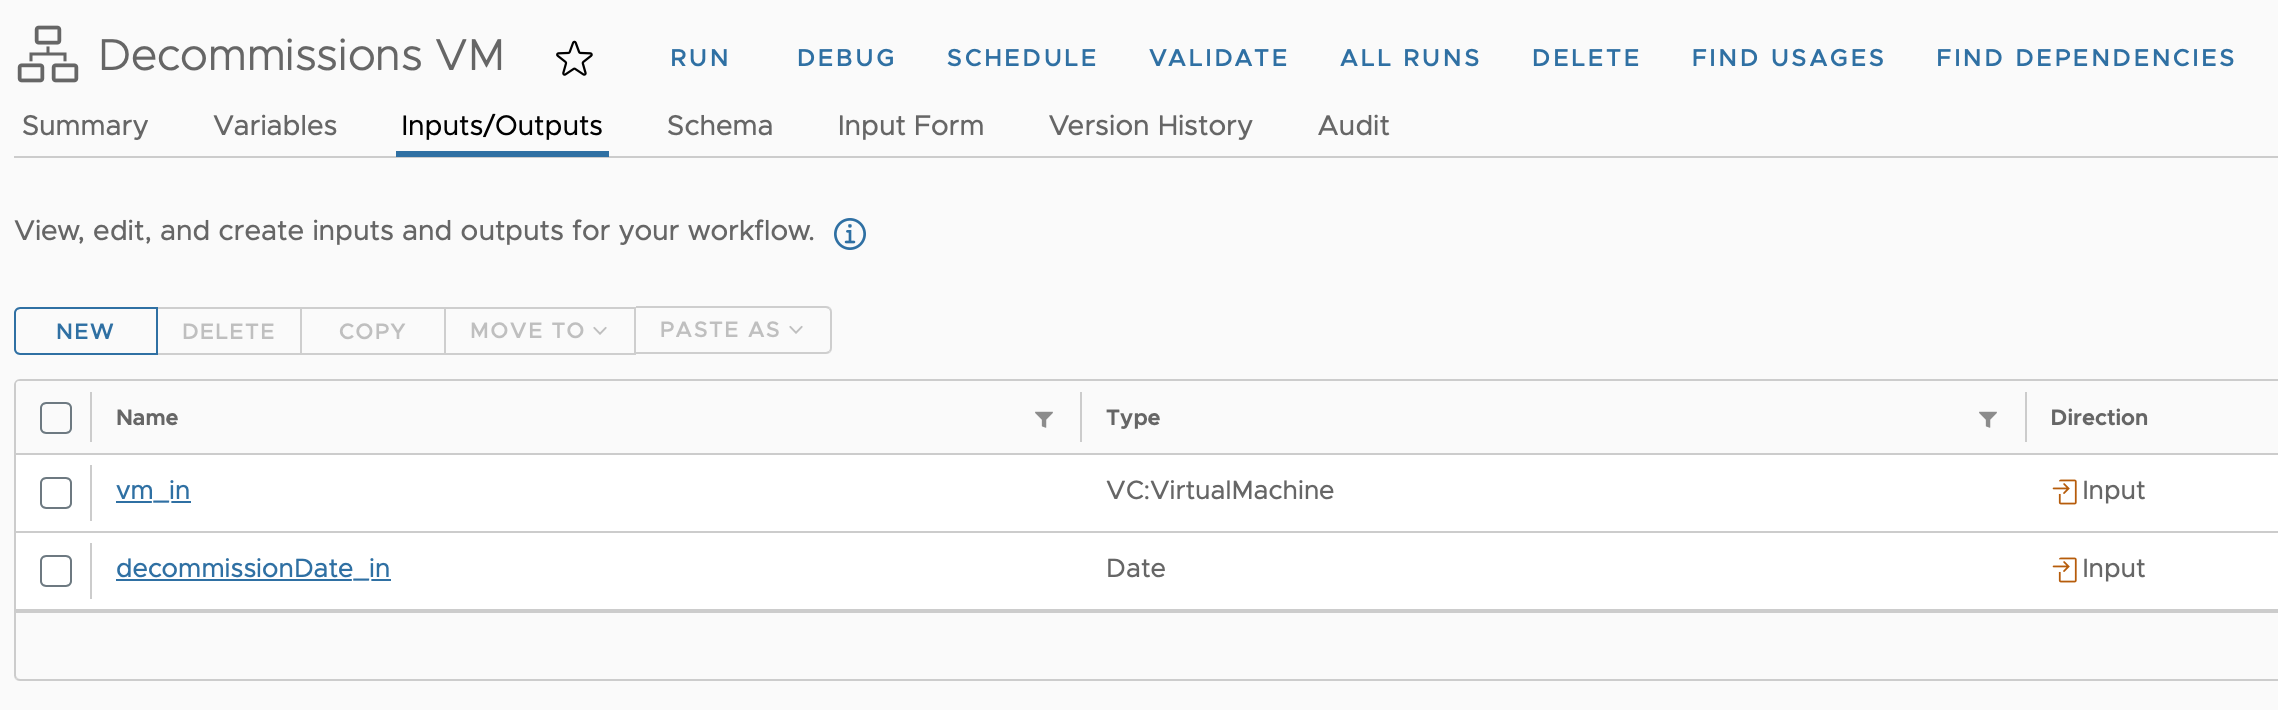
Find your decommission workflow and copy its ID.

The ID is hardcoded in the code for simplicity because that's not a goal of that demo. It is better to store such variables in the Configuration Elements. We'll cover this topic in one of the following posts.
Functions
The primary method in our class is _decommissionWorkflow(), which receives all required parameters and stores them in the workflowParameters_ property.
decommissionDate.setDate(decommissionDate.getDate() + decommissionDelay) is adding to the decommission date another 30 days.
We're also adding some _taskDescription_, which will help us understand where this scheduled task is coming from and who triggered it.
Server.getWorkflowWithId(decommissionWfId) finds and returns our decommission workflow as an object, which we can schedule.
export class Functions {
  private workflowParameters = new Properties();
  public decommissionWorkflow(vmObject: VcVirtualMachine, decommissionWfId: string, decommissionDate: Date, decommissionDelay: number) {
    const workflowParameters = new Properties();
    workflowParameters.put("vm_in", vmObject);
    workflowParameters.put("__taskName", `Decommission of VM ${vmObject.name}`);
    workflowParameters.put("decommissionDate_in", decommissionDate.setDate(decommissionDate.getDate() + decommissionDelay));
    workflowParameters.put(
      "__taskDescription",
      `Automatically scheduled task to decommission POC VM '${vmObject.name}' on ${decommissionDate}. Triggered by ${Server.getCurrentLdapUser()}`
    );
    const workflowObject: Workflow = Server.getWorkflowWithId(decommissionWfId);
    try {
      workflowObject.schedule(this.workflowParameters, decommissionDate, "", "");
      System.log(`The scheduled decommission for VM '${vmObject.name}' has been successfully done.`);
    } catch (error) {
      throw `Failed to schedule the decommission flow. ${error}`;
    }
  }
}
Push the package to vRO
mvn -T 10C clean install vrealize:push -Pvro01
After the package has been successfully pushed, let's review what we have.
- POC Example workflow with all the inputs we set in (which should match the inputs of the Decommission VM workflow).
- Decommission the VM workflow with all the relevant inputs, which will be scheduled at the end. In my case, my decommission workflow receives VM as an object and the decommission date (this workflow is beyond the scope of what we are discussing).
Run the workflow
Let's start our POC workflow. Please ensure that all the required inputs are filled out completely. Once done, we can proceed to run the workflow.

The execution was completed successfully; we can see the confirmation in the logs.

As a result, a new scheduled task has been applied. Take a look at the _Start Date_. The decommission was planned for April 17, but because we are adding mandatory 30 days, it will be decommissioned on May 17 as expected.
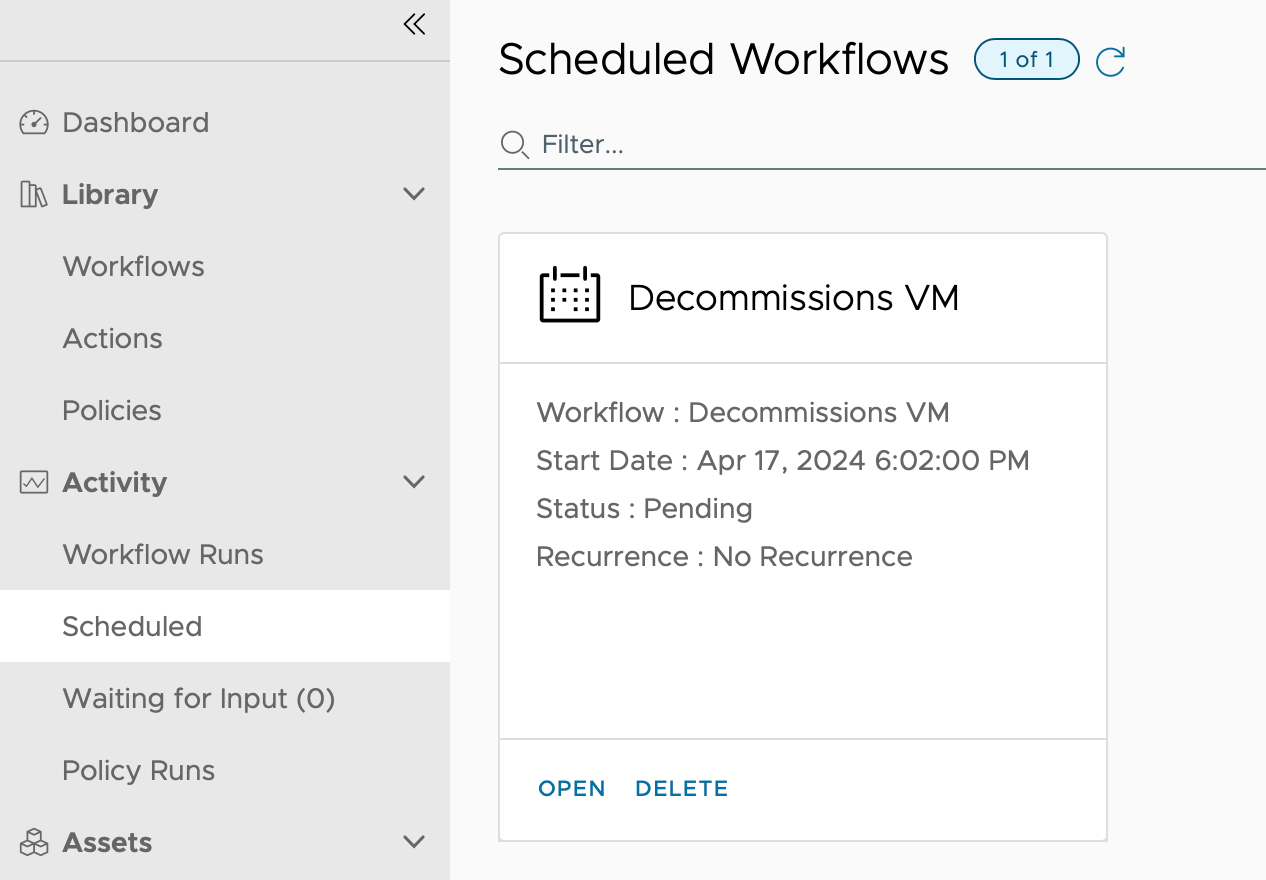
If we open scheduled workflows, we can view all the details, including the execution Description containing valuable information.
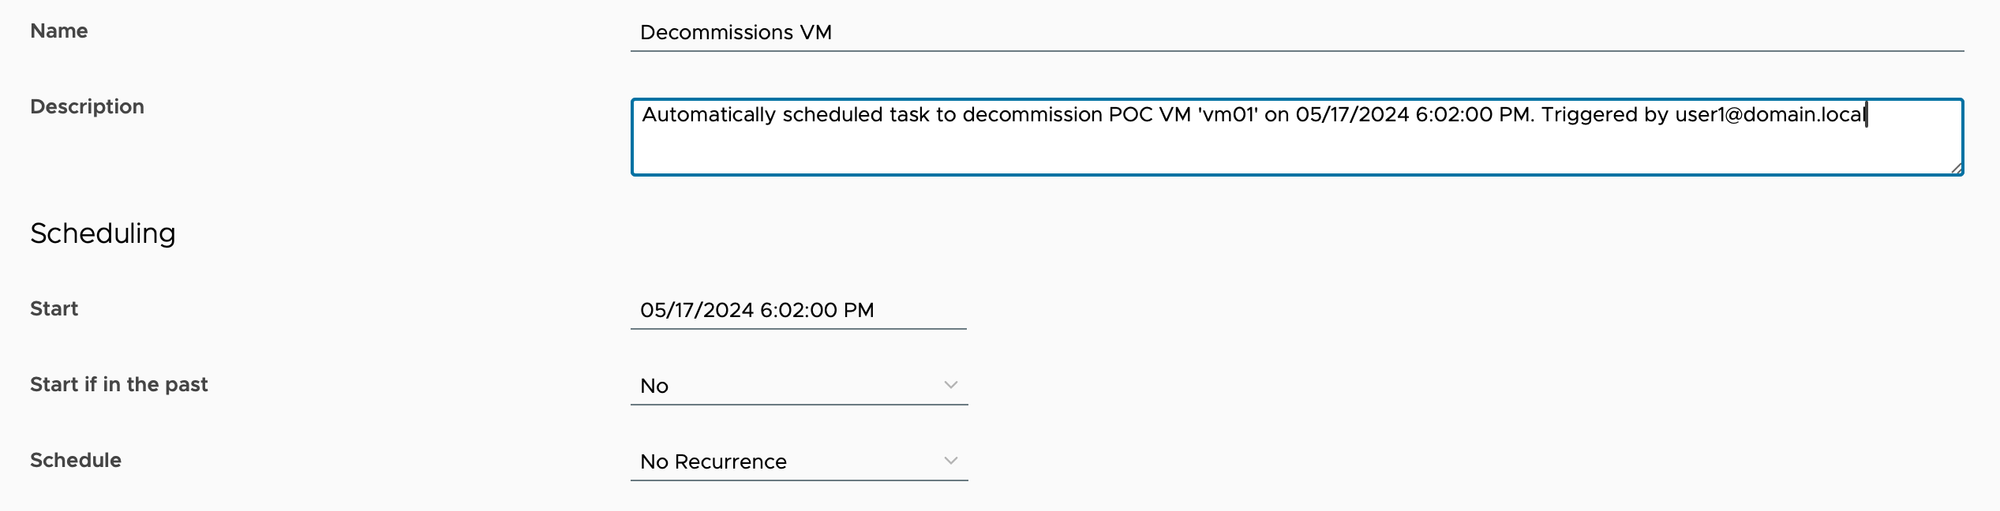
On May 17, this scheduler will run the decommission workflow.
Summary
Today, we learned how to make any resource self-destroyable using a VM example and understood why it is essential to delete temporary resources when they are not needed anymore.
Next step
In part two, we will discuss the Custom Form — how to make it more beautiful and External Validation — and what if the user selects to decommission the date in the past or longer than POC policy allows? :)
Source Code
The source code with the unit tests can be found here.
The vRO package is also available here and the external ECMASCRIPT package here.
